这几天看到有小伙伴将自己近期更新的博客同步显示到了GitHub主页,这么有趣的小卡片我是一定要尝试一把的,完整的教程我已经整理好了,一起搞起来吧~
大家好,我是小鑫同学 (opens new window)。一位长期从事前端开发的编程爱好者,我信奉编程最重要的是分享。请跟随小鑫同学的步伐,一起带你畅游不一样的前端世界~
这几天看到有小伙伴将自己近期更新的博客同步显示到了GitHub主页,这么有趣的小卡片我是一定要尝试一把的,完整的教程我已经整理好了,一起搞起来吧~
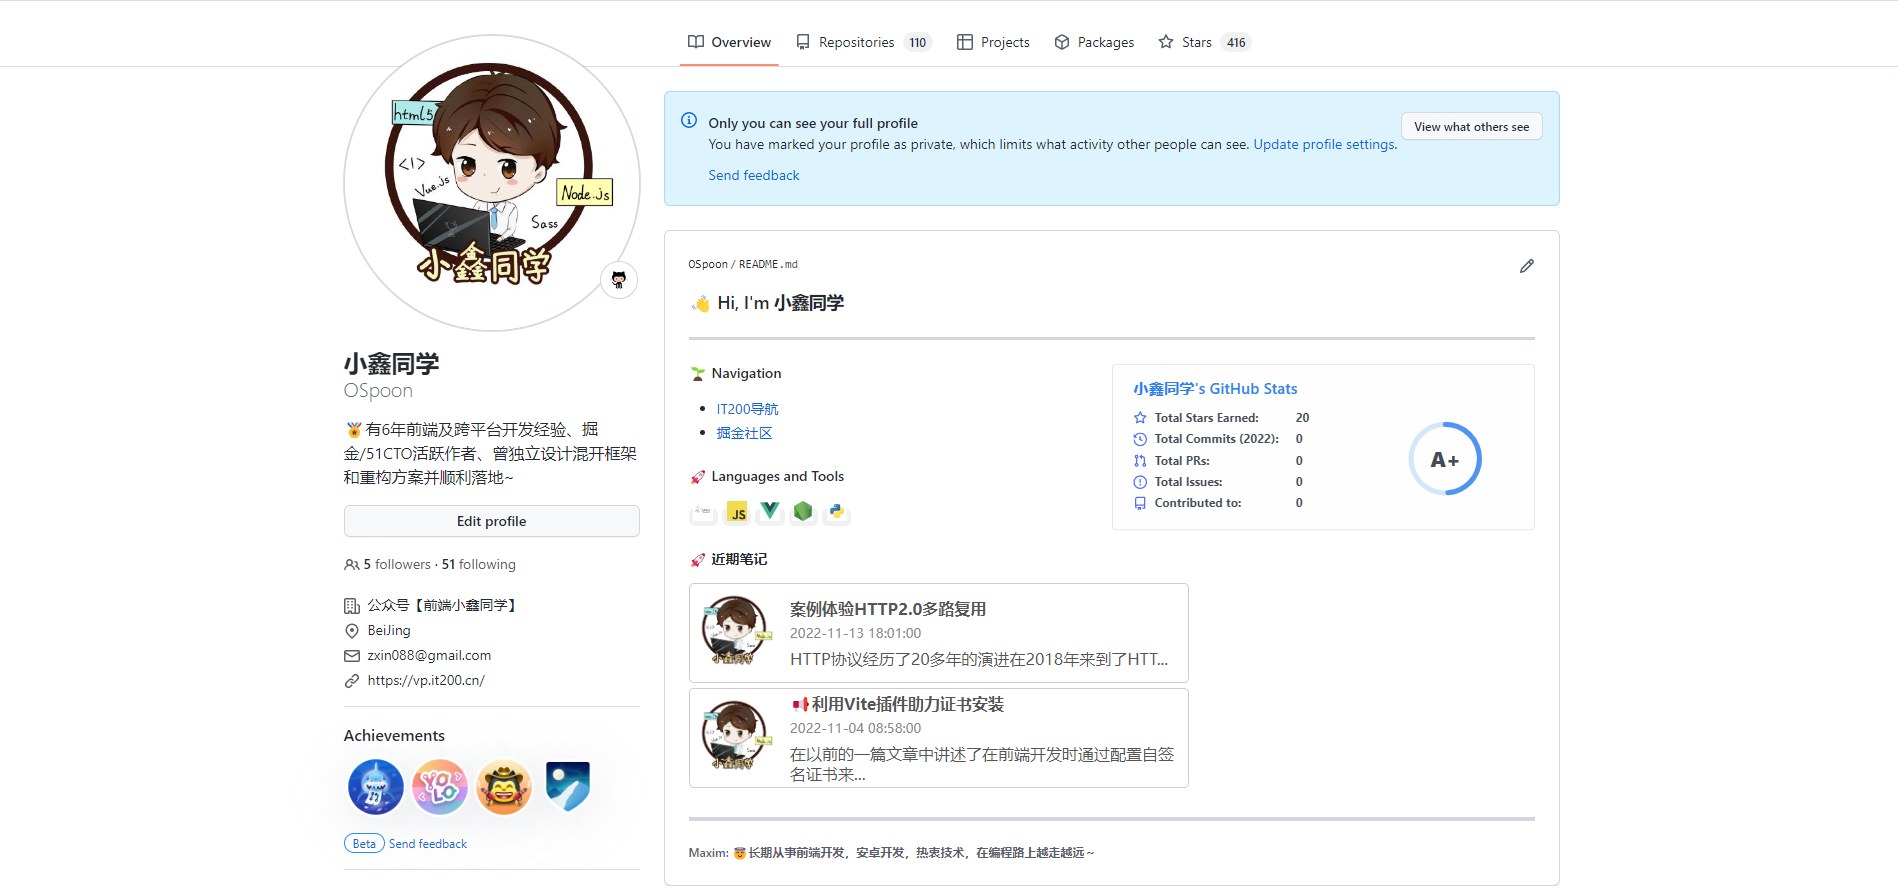
2. 开始教程
2.1 实现流程:
 Github的主页装修主要讲的就是主页的Markdown文档,当我们访问Github的主页时,Markdown内嵌的
img标签就会对文章卡片接口发起请求,经服务器对博客站点提供的RSS数据解析转换并生成卡片数据(svg)返回到Github,完成了博客卡片的一次渲染过程;
2.2 环境配置:
依赖模块: | axios | 发起请求用来转换RSS数据(XML to JSON) | | --- | --- | | art-template | Html模板引擎快速生成SVG数据 | | @vercel/node | 实现博客卡片接口 |
目录结构主要由api、generators、parsers组成:
github-readme-recent-article
├─ api
│  └─ blog
│     └─ [index].ts
├─ generators
│  ├─ index.ts
│  ├─ logo.ts
│  └─ template.html
├─ parsers
│  └─ index.ts
├─ logo.png
├─ package-lock.json
├─ package.json
├─ readme.md
└─ vercel.json
2
3
4
5
6
7
8
9
10
11
12
13
14
15
3. 开始编码
3.1 编写分析器:
分析器主要用来解析博客站点提供的RSS数据。并返回指定序号的文章数据,用来生成一张文章卡片~
提供getArticle函数获取指定序号的文章数据,其中使用到在线服务https://api.rss2json.com/v1/api.json?{rss_url}来转换RSS数据,因为我们操作JSON要不XML更加的方便:
import axios from 'axios';

export const getArticle = async (index) => {
  // 通过在线服务将RSS默认的xml数据转换为JSON格式
  const originUrl = 'https://it200.cn/rss.xml';
  const rssUrl = `https://api.rss2json.com/v1/api.json?rss_url=${originUrl}`;
  const { data: { items } } = await axios.get(rssUrl);
  const { title, pubDate: date, link: url, description } = items[
    index || 0
    ];
  return {
    title: title.length > 20 ? title.substring(0, 20) + ' ...' : title,
    url,
    date,
    description:
      description
      .replace(/<h3>.*<\/h3>|<figcaption>.*<\/figcaption>|<[^>]*>/gm, '')
      .substring(0, 30) + '...',
  };
}
2
3
4
5
6
7
8
9
10
11
12
13
14
15
16
17
18
19
20
3.2 编写文章卡片生成器:
由接口返回的数组组合成完成的SVG数据
文章卡片数据是一个SVG字符串组成,这样的话使用art-template模块将是一个不错的选择,通过导出的template函数很方便的获取的完整SVG数据来返回到Github:
import template from "art-template";
import {logo} from "./logo";

export const genArticleCard = (options: {
    title: string,
    url: string,
    date: string,
    description: string,
}) => {
    const { title, url, date, description } = options;
    return template(`${__dirname}/template.html`, {
        logo,
        title,
        url,
        date,
        description,
    });
}
2
3
4
5
6
7
8
9
10
11
12
13
14
15
16
17
18
art-template模块同样使用的是Mustache语法:
<svg fill="none" width="500" height="100" xmlns="http://www.w3.org/2000/svg">
  <foreignObject width="100%" height="100%">
    <div xmlns="http://www.w3.org/1999/xhtml">
      <style>
        ...
      </style>
      <div class="container">
        <img src="{{logo}}" />
        <div>
          <h3>{{title}}</h3>
          <small>{{date}}</small>
          <p>{{description}}</p>
        </div>
      </div>
    </div>
  </foreignObject>
</svg>
2
3
4
5
6
7
8
9
10
11
12
13
14
15
16
17
注意:在使用时发现Logo在Github渲染时出现了跨域的现象,所以我选择直接使用base64字符串来替换;
3.3 编写接口:
我们选择部署到
Vercel,接口编写使用Vercel的规则;
在项目根目录的配置文件中标明了接口的ROOT地址,[index]对应着请求时传递的文章序号参数:
- 接口地址定义:
api\blog\[index].ts - 接口实际地址:
[https://root-url/blog/0](https://github-readme-recent-article.vercel.app/blog/0)
{
  "version": 2,
  "rewrites": [
    {
      "source": "/(.*)",
      "destination": "/api/$1"
    }
  ]
}
2
3
4
5
6
7
8
9
解析请求参数中的index传到解析器中获取指定的文章数据,再将文章数据交由卡片生成器组装数据并返回到请求方:
import { NowRequest, NowResponse } from '@vercel/node';
import { getArticle } from '../../parsers/index';
import { genArticleCard } from '../../generators';

export default async (req: NowRequest, res: NowResponse) => {
  const { query: { index } } = req;
  const { title, url, date, description } = await getArticle(index);
  res.setHeader('Cache-Control', 's-maxage=3600, stale-while-revalidate');
  res.setHeader('Content-Type', 'image/svg+xml');
  return res.send(
    genArticleCard({
      title,
      url,
      date,
      description,
    })
  );
}
2
3
4
5
6
7
8
9
10
11
12
13
14
15
16
17
18
3.4 Vercel部署:
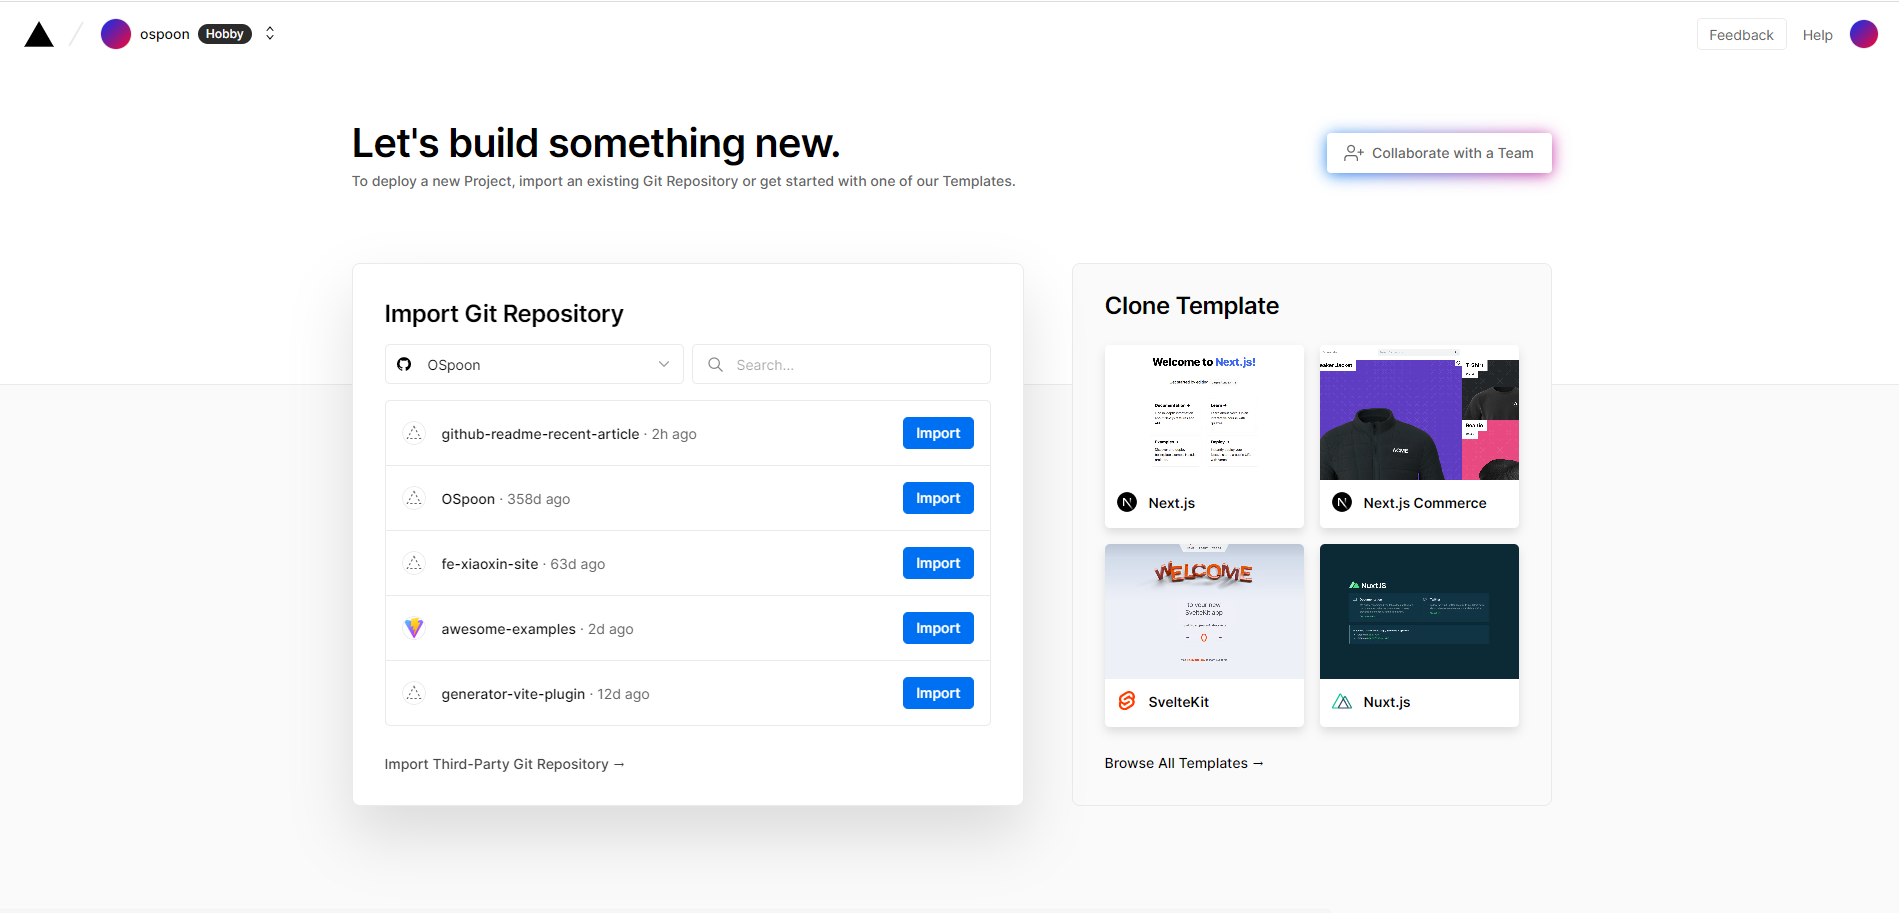
访问https://vercel.com/new (opens new window)页面开始新项目的部署,第一次部署完成后,后续将自动进行部署:
选择你要部署的项目,比如说我刚创建的第一个项目,点击import:
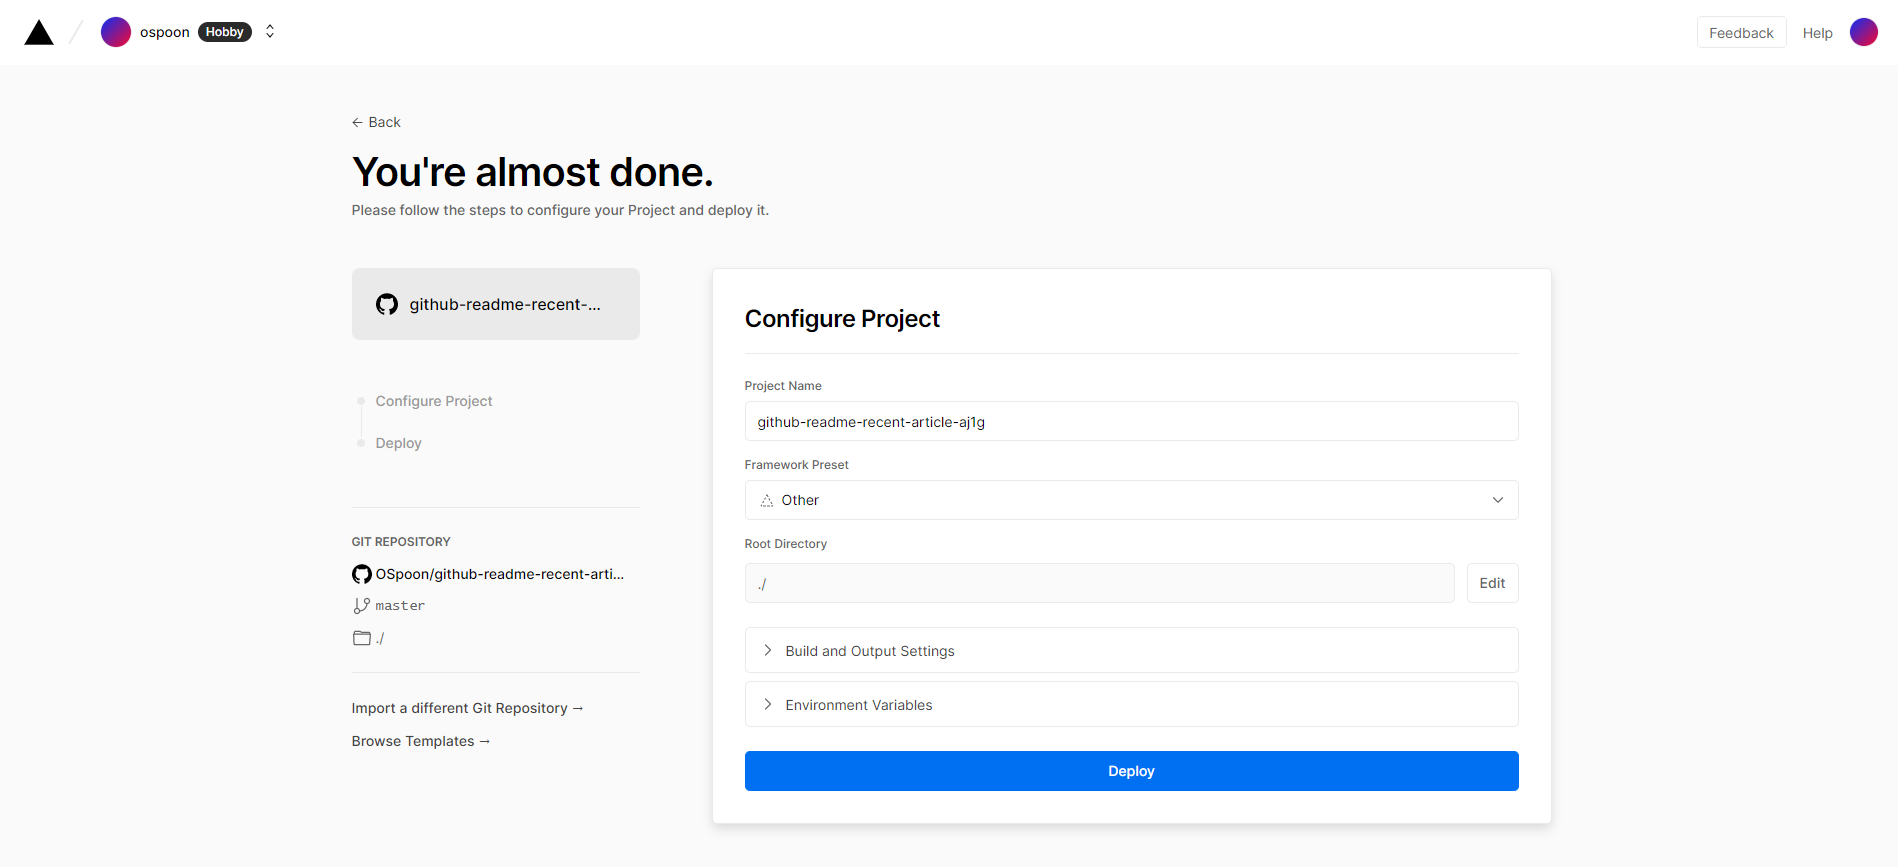
 不需要做更多的设置可以直接点击
Deploy开始部署:
 部署完成后就得到了项目的访问地址,如分配给我这个项目的github-readme-recent-article.vercel.app (opens new window):
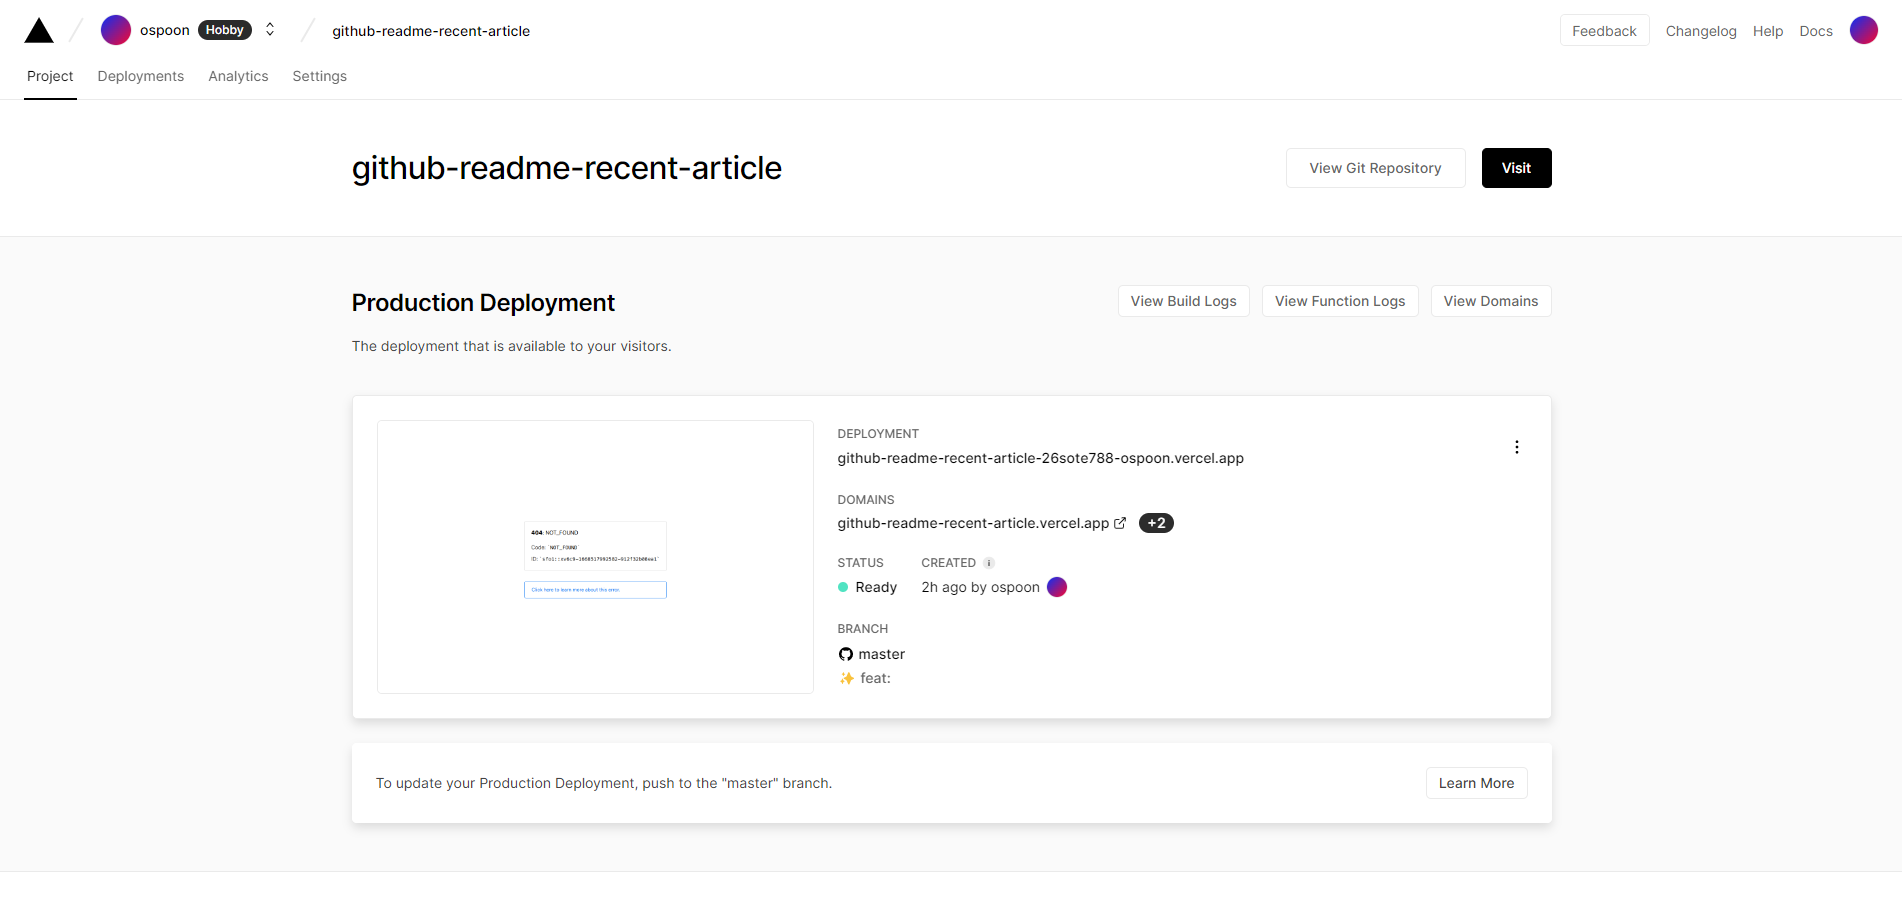 通过
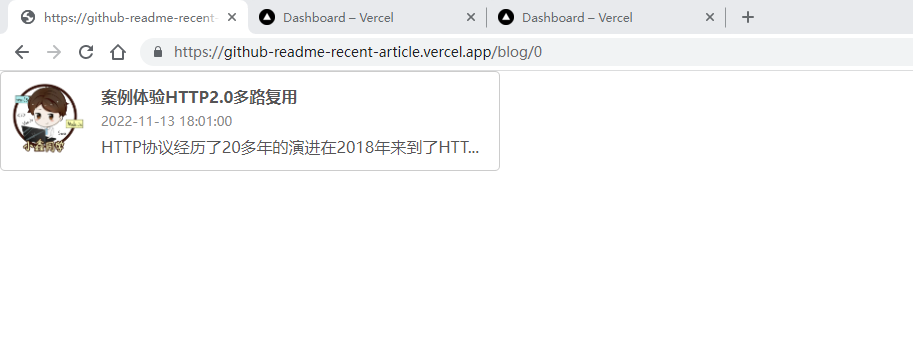
通过get形式获取序号0所对应的文章卡片:
4. 更新Github主页:
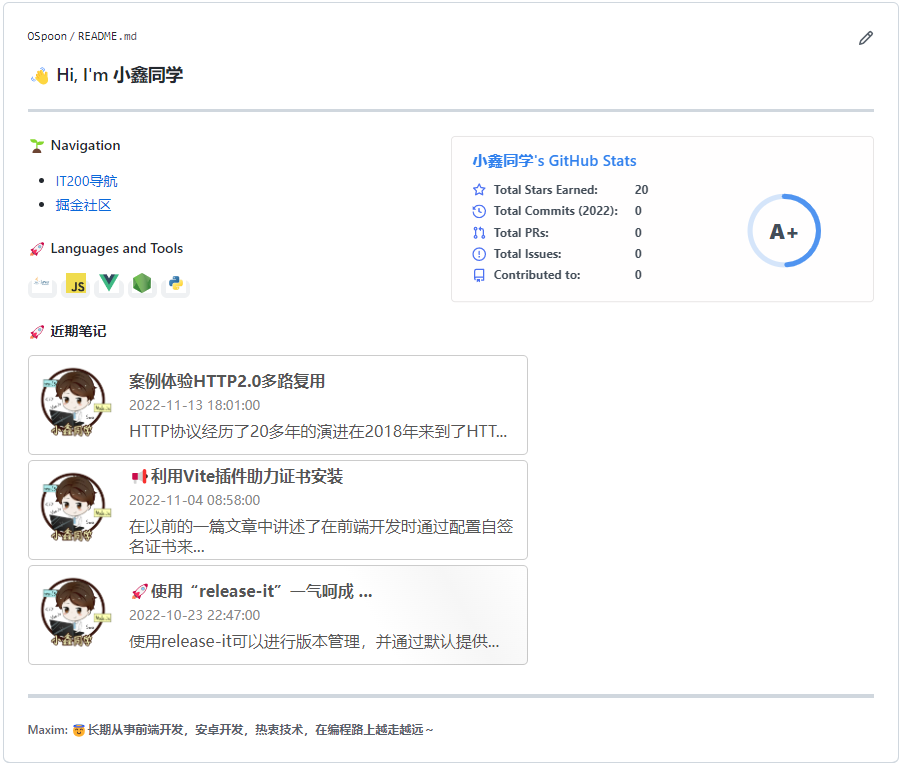
加入如下的内容来获取近3篇写的博客的卡片吧~
#### 🚀 近期笔记

<a target="_blank" href="https://it200.cn/">
  <img src="https://github-readme-recent-article.vercel.app/blog/0">
</a>

<a target="_blank" href="https://it200.cn/">
  <img src="https://github-readme-recent-article.vercel.app/blog/1">
</a>

<a target="_blank" href="https://it200.cn/">
  <img src="https://github-readme-recent-article.vercel.app/blog/2">
</a>
2
3
4
5
6
7
8
9
10
11
12
13
3. 总结
使用了120行左右的代码就实现了这个文章卡片在Github主页的展示,完整的代码已经上传至Github,欢迎你也尝试一下这个小巧的功能~
本文项目已推送至GitHub,欢迎克隆演示:
git clone git@github.com:OSpoon/github-readme-recent-article.git
如果看完觉得有收获,欢迎点赞、评论、分享支持一下。你的支持和肯定,是我坚持写作的动力~ 最后可以关注我@小鑫同学。欢迎点此扫码加我 (opens new window)交流,共同进步(还可以帮你fix🐛)~
